How can I create a walker with a finite trail?

Given this sketch:


Walker walker;

void settings() { size(640, 360); }

void setup() {
  windowTitle("Perlin Noise Walker");
  background(0);
  walker = new Walker();
}

void draw() {
  walker.step();
  walker.render();
}

class Walker {
  float tx, ty;
  float x, y;
  float prevX, prevY;

  Walker() {
    tx = 0;
    ty = 10_000;
    x = map(noise(tx), 0, 1, 0, width);
    y = map(noise(ty), 0, 1, 0, height);
  }

  void step() {
    prevX = x;
    prevY = y;

    x = map(noise(tx), 0, 1, 0, width);
    y = map(noise(ty), 0, 1, 0, height);

    tx += 0.01f;
    ty += 0.01f;
  }

  void render() {
    stroke(255);
    background(0); // no trail
    line(prevX, prevY, x, y);
  }
}

I’m wondering can I achieve this effect.

At the moment I can turn on and off the “trail” by calling background(0) on each render frame.

But it’s not a very good solution. I’d like the “trail” made by the walker to disappear after a few frames or a few seconds.

1 Like

Hello @benjamin-thomas,

This will add a trail that fades away:

  void render() {
    stroke(255);
    fill(0, 5);
    rect(0, 0, width, height); // no trail
    line(prevX, prevY, x, y);
  }

image

A look at Examples on the Processing page for inspiration:

One of many examples:

Consider an ArrayList of objects with a “Time to Live” for each object.

The Simulate examples may be of interest.

:)

1 Like

Thanks @glv, this feels like a nice trick :slight_smile:

1 Like

Really hate that it never fades back to pure black in processing, I did see a work around with pixels somewhere a few years ago but turned out to be slow, I know its a float issue but would be nice to have a clean solution

2 Likes

Indeed, I didn’t see this at first. I’ve managed to work around this issue like this:


Walker[] walkers;

void settings() { size(640, 360); }

void setup() {
  windowTitle("Perlin Noise Walker");
  background(0); // black
  walkers = new Walker[]{
      new Walker(0f, 10_000f),
      new Walker(15_000f, 25_000f),
  };
}

void draw() {
  for (Walker walker : walkers) {
    walker.step();
    walker.render();
  }
}

class Walker {
  float tx, ty;
  float x, y;
  float prevX, prevY;

  Walker(float tx, float ty) {
    this.tx = tx;
    this.ty = ty;
    x = map(noise(tx), 0, 1, 0, width);
    y = map(noise(ty), 0, 1, 0, height);
  }

  void step() {
    prevX = x;
    prevY = y;

    x = map(noise(tx), 0, 1, 0, width);
    y = map(noise(ty), 0, 1, 0, height);

    tx += 0.01f;
    ty += 0.01f;
  }

  void render() {
    stroke(255);
    line(prevX, prevY, x, y);

    // Make trail finite
    noStroke();
    fill(0, 30);
    rect(0, 0, width, height);

    // Really clear. A faint trail remains indefinitely otherwise.
    if (frameCount % 60 == 0)
      background(0);
  }
}

It works okay for the short trail I had in mind but I’d be interested to know if there’s a better way to handle that problem.

1 Like

Hello @benjamin-thomas,

Consider using an ArrayList().
There is a learning curve to this but that is the fun part.

Example that I cooked up:

ArrayList<Integer> points = new ArrayList<Integer>();
int num = 360;

float phase;

void setup() {
  size(500, 500, P2D);
  for (int i=0; i<num; i++) 
  {
  points.add(i);
  }
}

void draw() 
  { 
  background(0);
  translate(width/2, height/2);
  phase += TAU/360;
  noStroke();
  for (int i=0; i<num; i++) 
    {
    int alpha = i*255/num;  
    fill(255, 0, 0, alpha);
    //float angle = i*TAU/num + phase;
    float angle = points.get(i)*TAU/num + phase; 
    float x = 200*cos(angle);
    float y = 200*sin(angle); 
    circle(x, y, 10);
    }
  }

Start simple and build on that.
The above is just storing points for now…

Your will have to add and remove objects/elements from an ArrayList of objects created with your class as your random walker generates these and then redraw these for each draw() cycle.

:)

Related topic:

I did suggest using an ArrayList and provided links and a very minimal example to inspire.

:)

Thanks for the nudge @glv : )

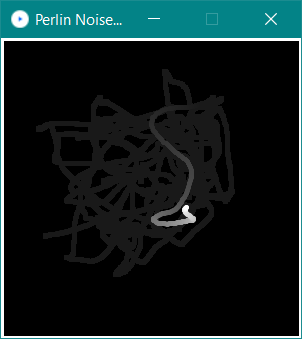
I couldn’t think of a good way to handle adding and removing elements to an ArrayList, so I instead tried to use a static array (acting like a buffer) and it seems to work quite well.

I then applied transparency linearly to make the trail fade as time passes.

private Walker[] walkers;

    @Override
    public void settings() {
        size(640, 360);
    }

    @Override
    public void setup() {
        windowTitle("Perlin Noise Walker");
        walkers = new Walker[]{
                new Walker(0f, 10_000f),
                new Walker(15_000f, 25_000f),
        };
    }

    @Override
    public void draw() {
        background(0); // clear previous renders
        stroke(255);
        strokeWeight(2);

        for (Walker walker : walkers) {
            walker.step();
            walker.render();
        }
    }

    class Walker {
        private int cursor;
        private float tx, ty;
        private final PVector[] points = new PVector[25]; // adjust trail size here

        Walker(float tx, float ty) {
            this.tx = tx;
            this.ty = ty;
            this.cursor = 0;
            step();
        }

        void step() {
            float x = map(noise(tx), 0, 1, 0, width);
            float y = map(noise(ty), 0, 1, 0, height);

            points[this.cursor] = new PVector(x, y);
            this.cursor++;


            // Clear trail once buffer has been filled.
            if (this.cursor >= points.length) {
                // shift all by one (clear first data point)
                for (int i = 1; i < points.length; i++) {
                    points[i - 1] = points[i];
                }
                // backtrack
                this.cursor--;
            }

            tx += 0.01f;
            ty += 0.01f;
        }

        void render() {
            for (int i = 1; i < points.length; i++) {
                PVector v = points[i];
                if (v == null) break; // buffer not filled yet

                PVector prev = points[i - 1];

                // Make the trail fainter and fainter
                float progression = i / ((float) points.length);
                float alpha = 255 * progression;
                stroke(255, 255, 255, alpha);

                line(prev.x, prev.y, v.x, v.y);
            }
        }

    }

image

1 Like

Many ways to code things… something is learned with each path taken.

Example with add and remove:

// GLV
// 2023-04-13
// Plot with fading trail
// Version 1.0.0

ArrayList<Float> theta = new ArrayList<Float>();
ArrayList<Float> rad = new ArrayList<Float>();

void setup() 
  {
  size(500, 500);
  }

float angle0;
int slice;
int div;

void draw() 
  { 
  background(0);
  translate(width/2, height/2);
  noStroke();
  
  int sliceSize = 90; // degrees
  
  div = 360;
  
  // Update
  angle0 = (frameCount%div)*(TAU/div); //0 to TAU in radians and repeat
  theta.add(angle0);
  // Try different values for rad
  //rad.add(150.0);
  //rad.add(random(145, 156)); // 145 to 155
  rad.add(150+30*sin(angle0*6.0));
  slice = theta.size();
  
  if (slice>sliceSize)
    {
    theta.remove(0);
    rad.remove(0);
    }
  
  // Render
  for (int i=0; i<theta.size(); i++) 
    {
    render(i);
    }
  } 
  
void render(int j)
  {
  float r = rad.get(j); 
  float angle = theta.get(j); 
  float x = r*cos(angle);
  float y = r*sin(angle); 
  
  int alpha = j*255/(slice); 
  fill(255, 128, 0, alpha);
  circle(x, y, 5);
  //println(j, r, theta.get(j), degrees(angle), x, y, alpha); //debug as required
  }

A 270 slice:

Have fun!

:)

Oh now I get it :slight_smile:

Many thanks!

This actually has a great solution without the ugly trails using blendMode(SUBTRACT) for fading to black as seen in the code example below or using blendMode(ADD) for fading towards white. This is fast and clean. You can even use blendMode(LIGHTEST) to enforce a less extreme color like 38/255 as the minimum and similarly also blendMode(DARKEST).

void setup() {
  size(500, 500);
  colorMode(RGB, 255, 255, 255, 100);
  background(0);
}

void draw() {
  // fade to black
  noStroke();
  fill(1);
  blendMode(SUBTRACT);
  rect(0, 0, width, height);

  // reset blend mode
  blendMode(BLEND);

  // draw rotating circle
  float t = radians(frameCount);
  float r = 200;
  float x = r * cos(t);
  float y = r * sin(t);
  float s = 50;
  translate(width/2, height/2);
  fill(255);
  ellipse(x, y, s, s);
}

1

2 Likes

Nice! That look like a cool technique, thanks :slight_smile:

1 Like

Legend, been working with particles and had that issue for years lol, you just solved it, sad because ive used blend mode many times for a glow effect and never thought of using it in this sense, thanks matey for adding to my knowledge

1 Like